DIY Measuring Guide
You do not need a professional/installer to pad your facility. Installing wall pads is so easy you can Do It Yourself. Calculating a perfect fit can be tricky but we are here to help. Send us in the dimensions of your room and we will create a custom fit to your room free of charge.

To get started you will need
Pencil
Paper
Clipboard
Special objects include but are not limited to:
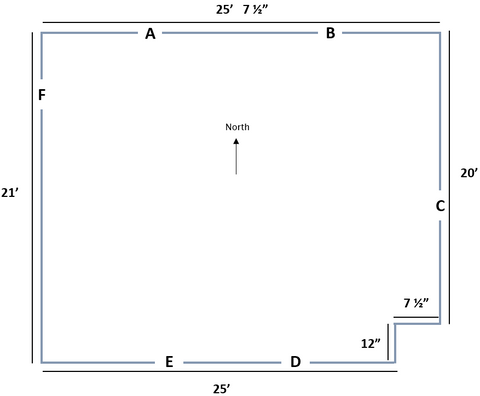
Brid’s Eye View
Start by drawing a general overview of your room.
Obstacles
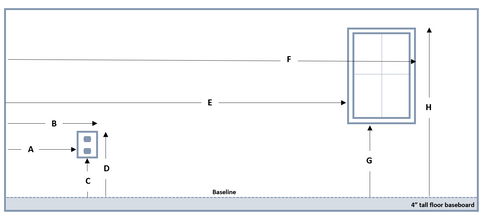
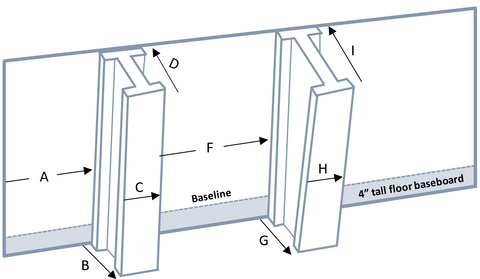
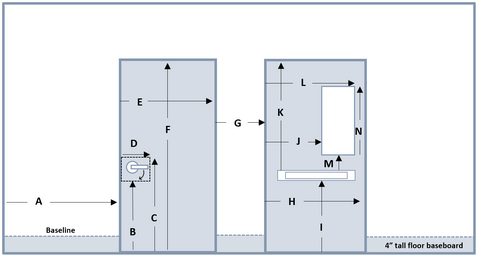
When taking measurements, think about where you are hanging the pad. You may need to install the wall pads above a floor mat or baseboard. To indicate where each obstacle is located at on the wall, always face the wall head on and start from the left. The bottom of the pad is called the “baseline," measure from the baseline on upward. In the diagrams, the letters represent the measurements needed for cutout.
North Wall: Outlets/light switch and window
To create outlet and light switch cutouts on site during installation click here to see our 4” x 6” wall pad insert.
East Wall
South Wall
West Wall
Replacing Existing Wall Pads
If your gym is ready for an update, it is crucial to give the wall measurements and not the existing pad measurements. The outside of the pad is larger than the wall due to the thickness of the foam. In the photo right is an example of an i-beam. The beam is 8 inches wide and the pad is 2” thick. The outside measurements of the pad is 12 inches (2 inches for the left side and 2” inches for the right side.)
Next →
← Previous


