
How to Install Outdoor Stadium Wall Pads
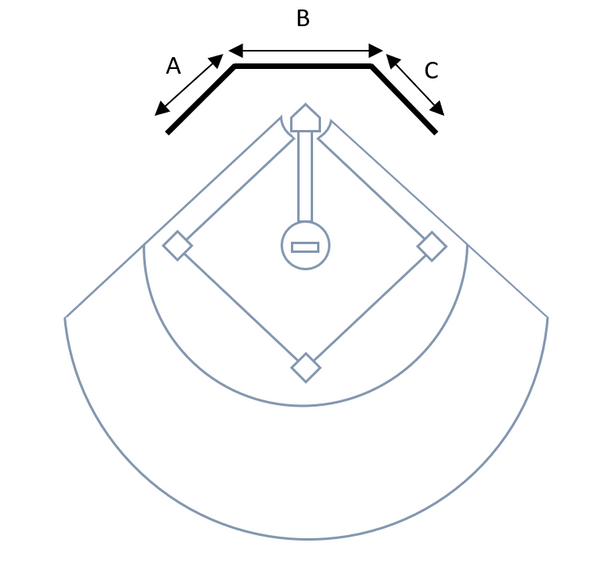
No two baseball and softball fields are alike, which is why AK Athletics manufactures each pad per order. Email us the measurements of your field indicating any 45 degree wall turns or poles to pad around. After a member of our sales department receives your measurements via email, they will send you an estimate valid for 30 days.
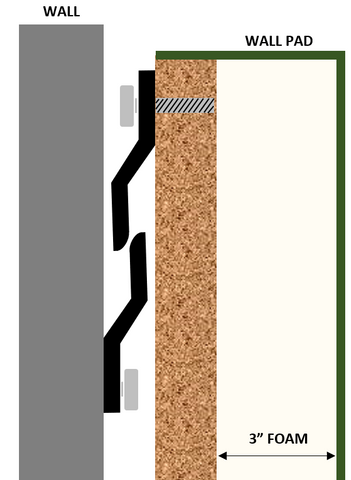
Step 1. Familiarize yourself with z-clips
Each wall z-clip will have an identical mate to attach to the pad. When fastening the clip, it is essential to have the clip facing in the correct direction to provide maximum support. In the diagram below you will see the bold black z-clip on the pointing up and the clip for the pad pointing down to hang on the corresponding z clip. The curved end on the z-clip is a great indicator when establishing the direction. Also, the curved ends assist in attaching and removing panels. When the clips glide into one another, it should overlap one inch.
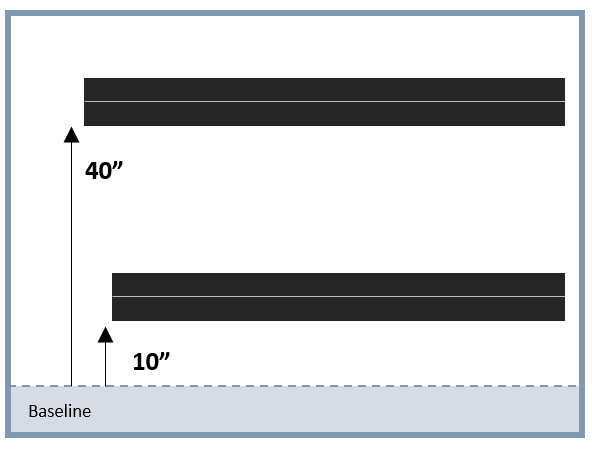
Step 2. Create a baseline
Installing the outdoor stadium wall pads slightly above the ground (around 3”) will enhance the overall professional look, reduce wrinkles and allow water to drain from the weep holes located on the bottom of each panel.
On the walls needing protective padding, create your baseline representing the bottom of wall safety padding. We found it best to use a chalk line to snap a horizontal line that runs parallel to the ground. Use a level to determine if your chalk line is accurate; avoid any up or down sloping.
With the same method for the baseline, create an additional line representing the height of wall padding.
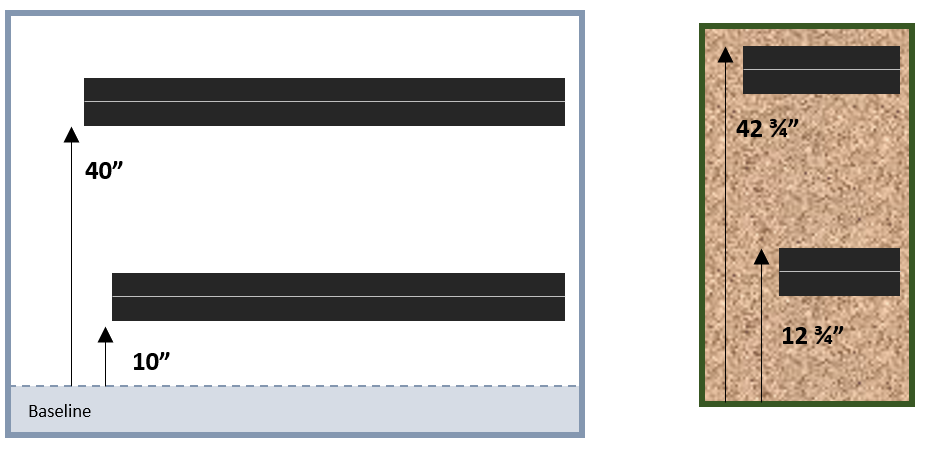
Within the two chalk lines hang two z-clips onto the wall, a section towards the top and the other near the bottom. Attach the z-clips to the wall in 20 feet increments to verify alignment.
Starting at the baseline measure on up to bottom of each z-clip.
E.g.
Step 3. Install z-clip
To attach the z clip to the wall safety panel, determine the bottom of the panel by locating the weep hole to drain the water. Lay the pad flat backside facing up.
With a permanent marker indicate the location for the top of the z clip by measuring from the bottom of the safety wall panel up to the base of the wall z clip and add 2 ¾”. With ⅜” screws, attach the clip into the pad. Repeat the previous step for the bottom set of z-clips attachment.
Hang the wall pad onto the clips previously screwed into the wall. Mounting hardware should be concealed behind the wall pads.
Next →
← Previous


